Cannavigia offers a robust platform designed to streamline the process of Sample Management, providing users with the tools necessary to track, analyze, and document samples effectively. The system allows easy tracking and management of samples, ensuring compliance with quality standards.
In this article, you'll find this list of topics that you can click on to quickly access the information you need:
- Samples Overview
- Detailed Samples View
- Create a Sample
- Edit a Sample
- Submit a Sample for Laboratory Testing
- Download an Analysis Order Form
- Add Notes
- Generate QR code for Packages
- Archive a Sample
- Upload Existing Lab Results
Samples Overview
To access the Samples section, simply go to the Quality > Samples. In this section, you will encounter four tabs:
-
Inventory: shows all the current samples you currently possess in the system with the following information: Sample ID, Batch source, Content, Cultivars, Amount, Date, Laboratory, Status and Action
-
Archive: This tab shows all the samples you have archived with the following information: Sample ID, Batch source, Laboratory testing, Content, Cultivars, Date, Weight and Actions
-
Notes: Here, you can see all notes created relating to your samples with the information: Sate, User, Status, Entity, Note and Actions
-
Log: The log is a system-generated record of all actions that have been performed on the system relating to samples, that cannot be edited and where you find this infomation: Date, User, ID, Type, Message, and Verification ID
You can also access to the 'Batch Source' Origin Batch of the sample to see the respective source batch detail view.

Detailed Samples View
There are two ways to reach the Detailed Samples View page:
-
In the Samples Inventory page (Quality > Samples), choose the sample you want to view and click on the green View icon
-
In the Samples Inventory page (Quality > Samples), click on the highlighted green Sample ID of the sample batch you wish to view

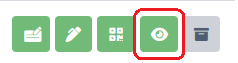
The Detailed Samples View page shows you in-depth information about a particular sample batch. Here, you are able to upload existing lab results, add a note, generate a QR code as well as download an order form for that batch:
The collected data can be seen in the following 3 tabs in the Detailed Samples View page:
- Lab results
- Notes
- Log

-
Open the batch from which you wish to collect a sample:
-
-
Plant Batch
-
Harvest Batch
-
Article Batch
-
-
-
Click on the Actions button and choose "Take Sample"

-
The sample window will open to record the following data:
-
Content*: it will be automatically filled, but you can modify it if needed
-
Source: sample source, impossible to change
-
Amount*: specify the quantity or amount of the sample based on the batch units
-
Date*: the date when the sample was collected or created
-
-
To create the sample just click the green button Create

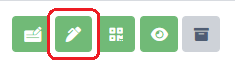
Edit a Sample
A sample can be edited with the following buttons:
-
Order/Submit Sample to Laboratory for testing
-
Add Note
-
Add QR code to Print Center
-
View
-
Archive

 |
Submit Sample to Laboratory for Testing (*Will only display if you have not yet submitted the sample for lab testing) |
|
|
Order (*Will only display after you have submitted the sample for lab testing) |
 |
Add note |
 |
Generate QR-code |
 |
View |
 |
Archive |

Submit a Sample for Laboratory Testing
Lab samples can be sent directly to a connected lab, allowing analysis results to be digitally assigned to the corresponding sample in the Cannavigia software:
-
In the Samples page (Quality > Samples) click on the green Lab button
 for the sample you wish to send to the laboratory
 -
The Submit Sample for testing dialog box opens
-
-
Choose Laboratory* from the drop-down list:
-
Other
- cbd-test.ch
-
-
Note: Currently only CBD-Test (http://cbd-test.ch ) is integrated. However, we are working on developments that will allow users to add affiliated laboratories directly into the software.
If you choose "Other" Laboratory, fill the following:
-
Contact from the Contact drop-down list
-
Date*
-
Option to Generate Cannavigia Order Form or Upload Custom Order Form
-
Click Submit

If you choose "cbd-test.ch" Laboratory, fill the following:
- Select the desired Laboratory analyses by ticking the corresponding entries; for most tests, you have the option between standard delivery (3-5 working days) or express delivery (1-2 working days)
- Read and accept the terms and conditions from Home - CBD-Test by ticking on the box at the end, provided you agree with them
- Click Submit to accept the information and close the dialog box

In both cases, you will be taken directly to the detailed view of the laboratory sample you have just created, from where you can check and download the laboratory order.
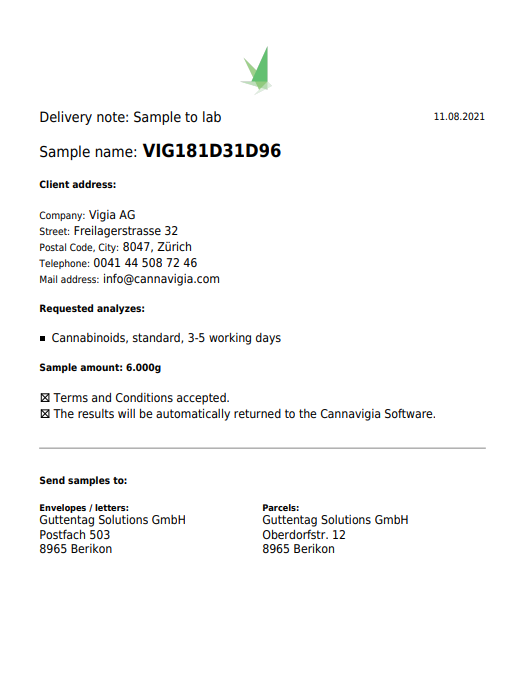
Download an Analysis Order Form
After submitting your sample for testing through the Cannavigia software, you can also download a lab Order Form to be printed out and sent with the sample to the lab.
-
Choose the sample from the Samples Inventory for which you would like to download the Order Form
-
Click on the green button Order, to generate an Order Form (after submitted the sample)

OR
-
Open the Detailed Samples View page, by clicking on the highlighted green Sample ID of the sample batch you wish to open
-
Click on the Order button that downloads the Order’s PDF

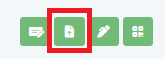
Add Notes
-
In the Samples Inventory page, click on the green button with the Add Note symbol
-
The Add note dialog box opens
- Here you can record comments, thoughts or other notes about your sample
- Click Save

Generate QR code for Packages
-
In the Samples Inventory page, click on the green button with the QR code symbol

-
The system will add the QR code to the Print Center

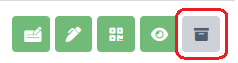
Archive a Sample
If a sample was entered by mistake or with incorrect information, you can archive it:
-
To do this, click on the gray button Archive in the Samples Inventory page
- A pop-up will open asking you to confirm your action. Click OK to proceed

Note: You can restore an archived sample at any time by clicking the Archive tab in the Samples page and then clicking the grey Restore package button.

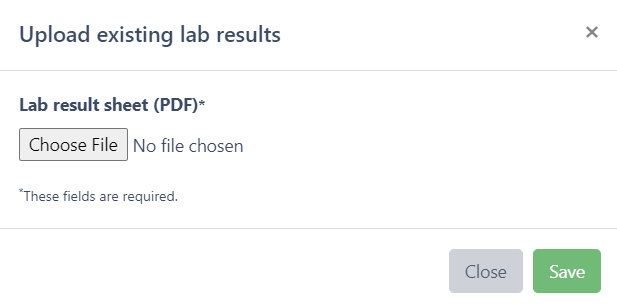
Upload Existing Lab Results
-
On the Sample's Detailed View, at the top right corner, click on the green button Upload existing lab results
-
The Upload existing lab results dialog box opens
- Click Choose File and navigate to the folder where the desired document is stored. In the Search field, you can search and select the desired file
- Click Save to upload the file and close the dialog box