Goods In
Efficient Goods In Process for Accurate Inventory Management
The Goods In process is a critical component of inventory management, which allows you to efficiently receive articles and their associated batches from suppliers into the system. This process ensures that all incoming goods are accurately recorded, checked against the manifest, and prepared for quality control.
In this article, you'll find this list of topics that you can click on to quickly access the information you need:
Goods In Process
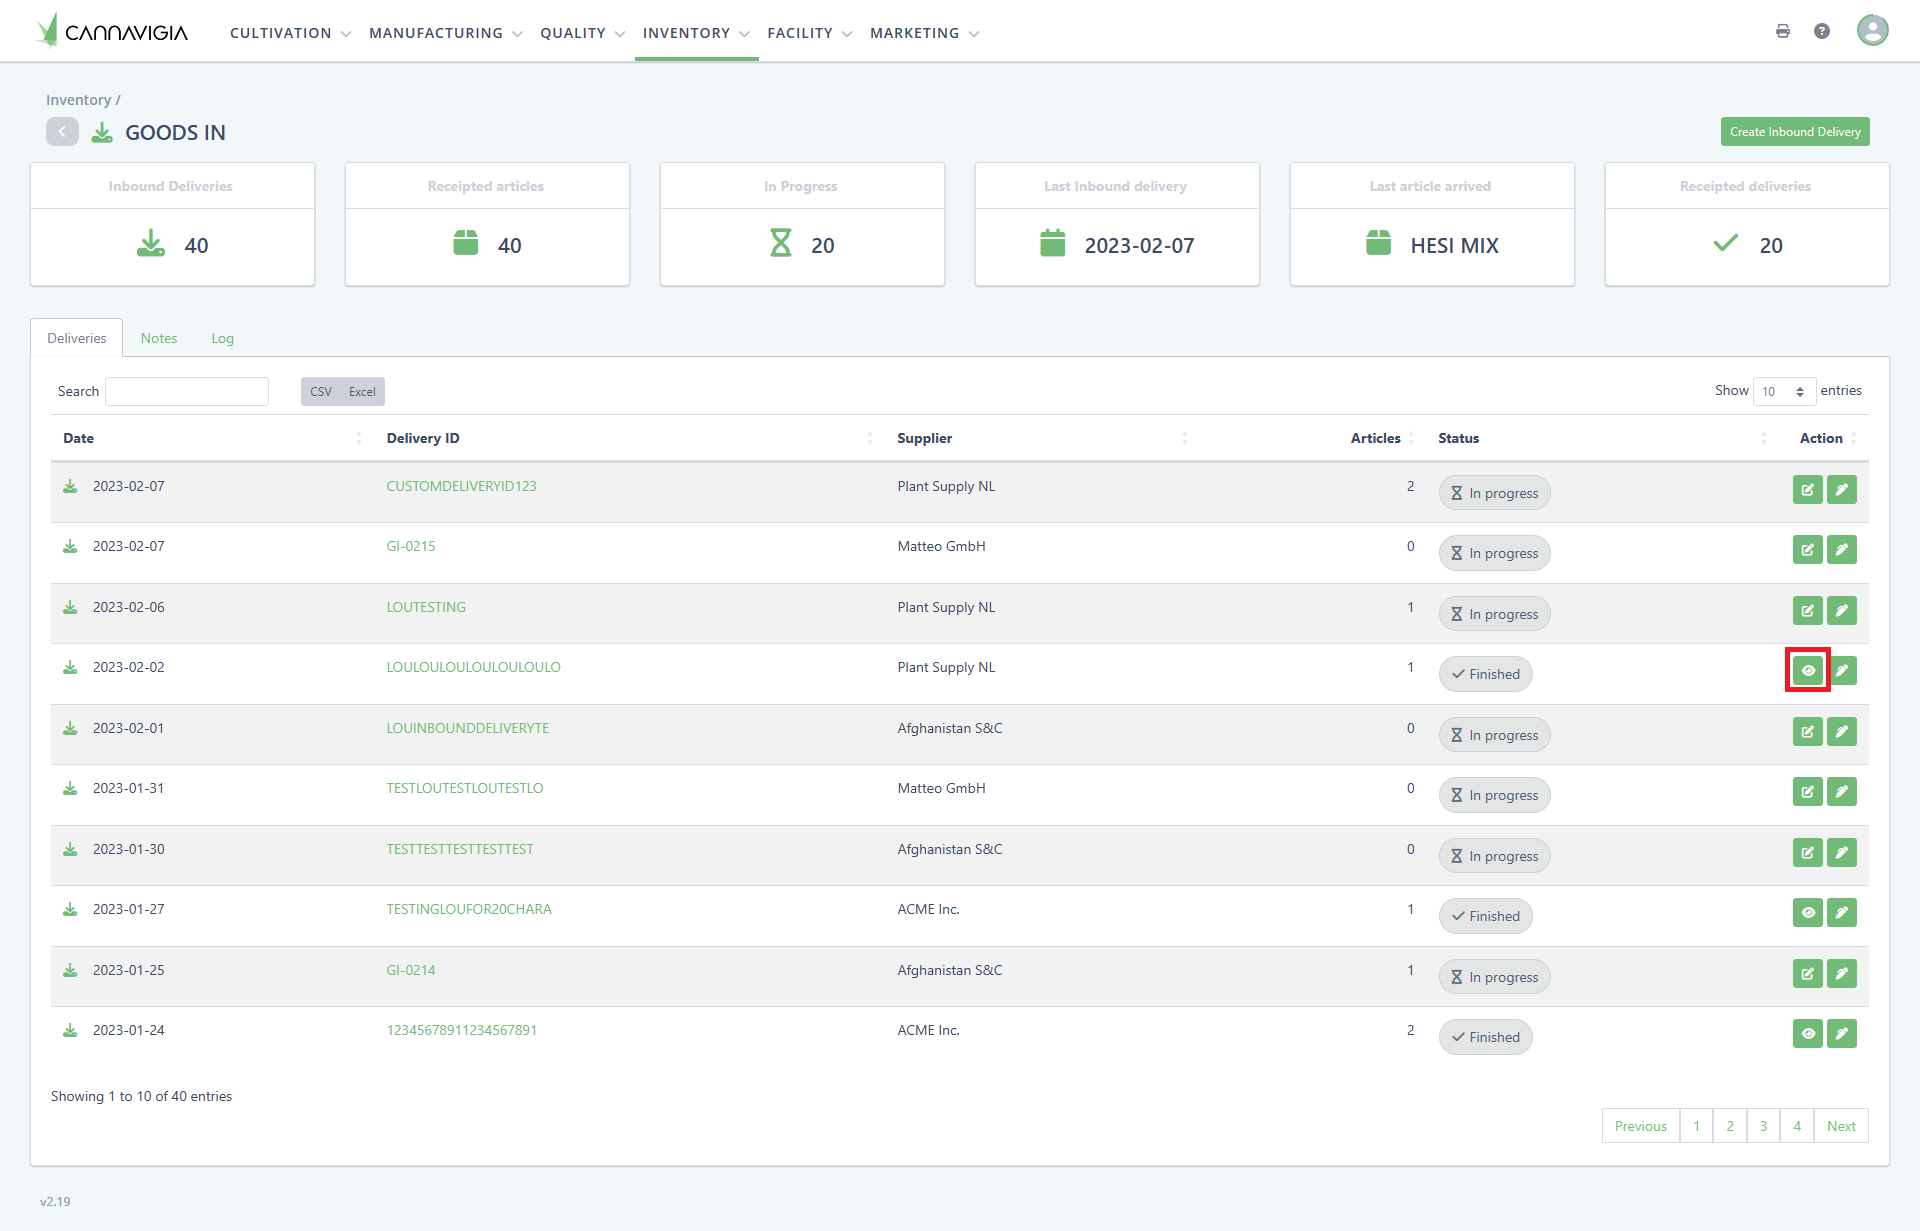
When you navigate to Goods In via Inventory > Goods In, you can view an overview of all current and completed goods received
Each delivery is assigned a unique Delivery ID, identifiable by the GI-prefix or your own internal identifiers if manually set.
-
Receiving Deliveries: The Goods In process involves verifying that all incoming articles match the delivery manifest, this includes checking for any discrepancies, such as under or over-delivery and expiry dates
-
Completing the Process: Once everything is verified, and the delivery is marked complete, labels are applied to the goods
-
Proceed to Quality Control: After the delivery process is finalized, proceed to the Quality Control by navigating to Quality > Quality Control to ensure all received goods meet the required standards
Note: Articles must be individually added/created beforehand in Inventory > Articles before they can be receipted within Goods In.
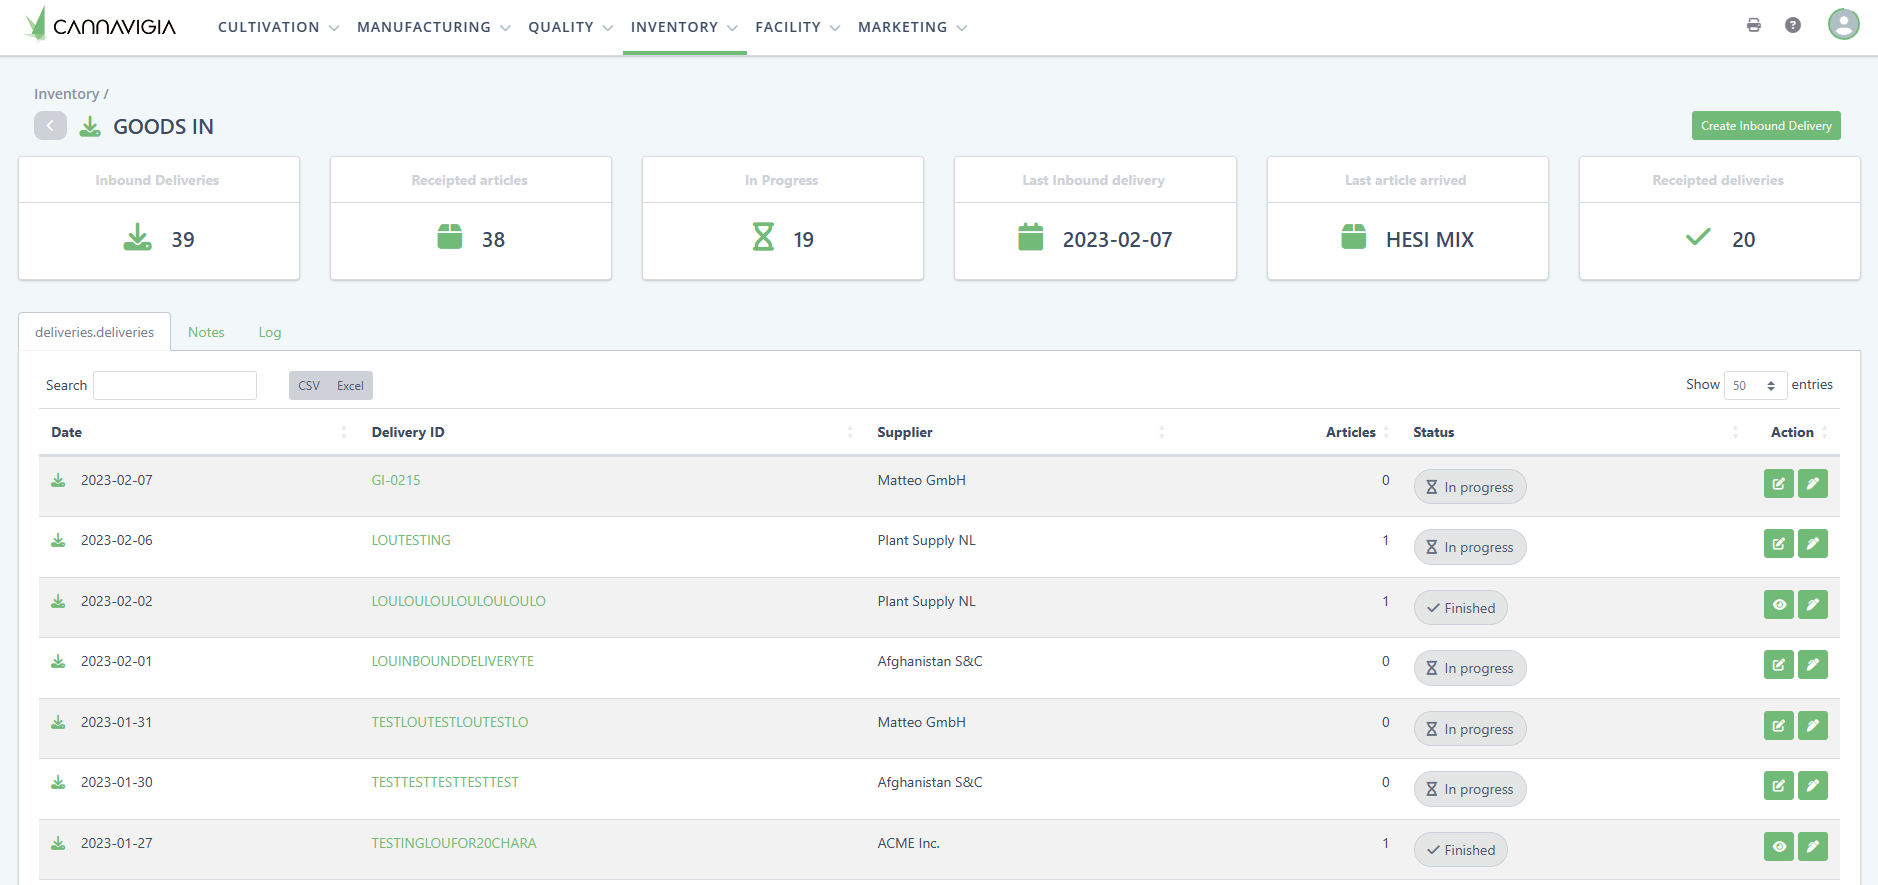
Below the six information cards at the top of the table, you can see the following tabs:
-
Deliveries: Table view that shows all deliveries and their status
-
Notes: Table view of the notes related to your deliveries
-
Log: Table view of the system-generated logs of all actions performed on your deliveries
Plan and Create Goods In Deliveries
Create an Inbound Delivery
Creating an Inbound Delivery in Cannavigia software allows you to pre-record incoming article batches, plan your goods reception in advance, and streamline the process upon arrival.
-
Navigate to Goods In by clicking on Inventory > Goods In
-
Click on the green Create Inbound Delivery button in the top right-hand corner

-
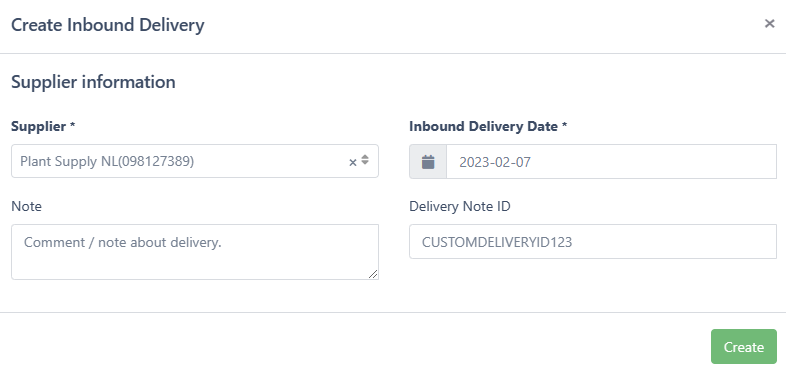
Create Inbound Delivery modal will open
-
Select the Supplier from the ▼ drop-down menu
-
Enter the Inbound Delivery Date
-
Type in the Delivery Note ID
-
-
Optionally, you can add a Note about the delivery
-
Click Create to open your Inbound Delivery
Add Articles to your Delivery
-
Navigate to the Inbound Delivery Detail View of the specific delivery you want to update
-
Click on the green Add batch button in the top right-hand corner

-
Select Article
-
Choose the correct article from the dropdown field
-
-
Select Article Type
-
Use the dropdown field to filter by Article Type if you do not know the specific article name
-
Depending on the article type, you can provide additional specific information
-
-
Add Plant Passport
-
These fields will be displayed only when the selected Article Type is either seeds or plants

-
-
Supplier Batch ID
-
Enter the batch code provided by the supplier for reference in case of any issues
-
-
Batch Quantity
-
Specify the number of batches being received, for example: if you’re receiving 15kg total in 3 batches of 5kg each, set the Batch Quantity to 3
-
-
Set Expiry Date
-
Enter the expiration date for the specific batch
-
-
Select Storage Area
-
Choose the area where you want to store the article initially
-
-
Set Internal Batch ID
-
If you prefer to use your own batch coding system, simply write the ID in this field, otherwise, the system will generate a batch code automatically
-
-
Add Notes and Documentation
-
Add any relevant notes
-
Upload any necessary documentation, such as certificates, analyses, or images of the incoming goods, by clicking Choose File
-
-
Click the green Add batch button to save the batch information

-
After adding the batch, you will be returned to the Inbound Delivery Detail View where the new batch will be listed in the table with columns for:
-
Article No.
-
Article Name
-
Article Unit
-
Batch Quantity
-
Batch ID
-
Expiry Date
-
Action (Options to edit, print label, or remove the batch)
-

Note: Click Add batch button again if you have more Articles and their associated batches to add.
-
The Status of the Inbound Delivery will be set to In progress
-
Actions: While In Progress you can Edit or Add Note

Receipt in Inbound Delivery
After entering all received articles, complete the delivery process and transfer it to Quality Control for further assessment.
-
Navigate to Goods In by clicking on Inventory > Goods In
-
Locate and click on the green hyperlink of the Delivery Note ID that corresponds to the delivery you want to receipt in, this will open the Inbound Delivery Detail View
- In the Inbound Delivery Detail View, click the Receipt in batches button

-
A Warning modal will appear:
"By receipting this delivery, you will not be able to add anymore batches to the Inbound Delivery."
-
If you’re ready to finalize the delivery, click the Receipt in Delivery button within the warning modal to proceed
-
If you are not ready to receipt the batches yet, click the Cancel button to go back and make any necessary adjustments

Note: By receipting in your delivery you will no longer be able to add anymore batches or edit the Inbound Delivery.
-
The Status of the Inbound Delivery will change to Finished
-
Actions: After Finished you can View or Add Note

-
If the article has a release process, the status is changed to Testing and is now visible within Quality Control (Quality > Quality Control). The article batch can no longer be processed within Goods In
-
If the article does not have a release process, the article batch status is changed directly to Released

Print QR Code Labels for Article Batches from Inbound Deliveries
-
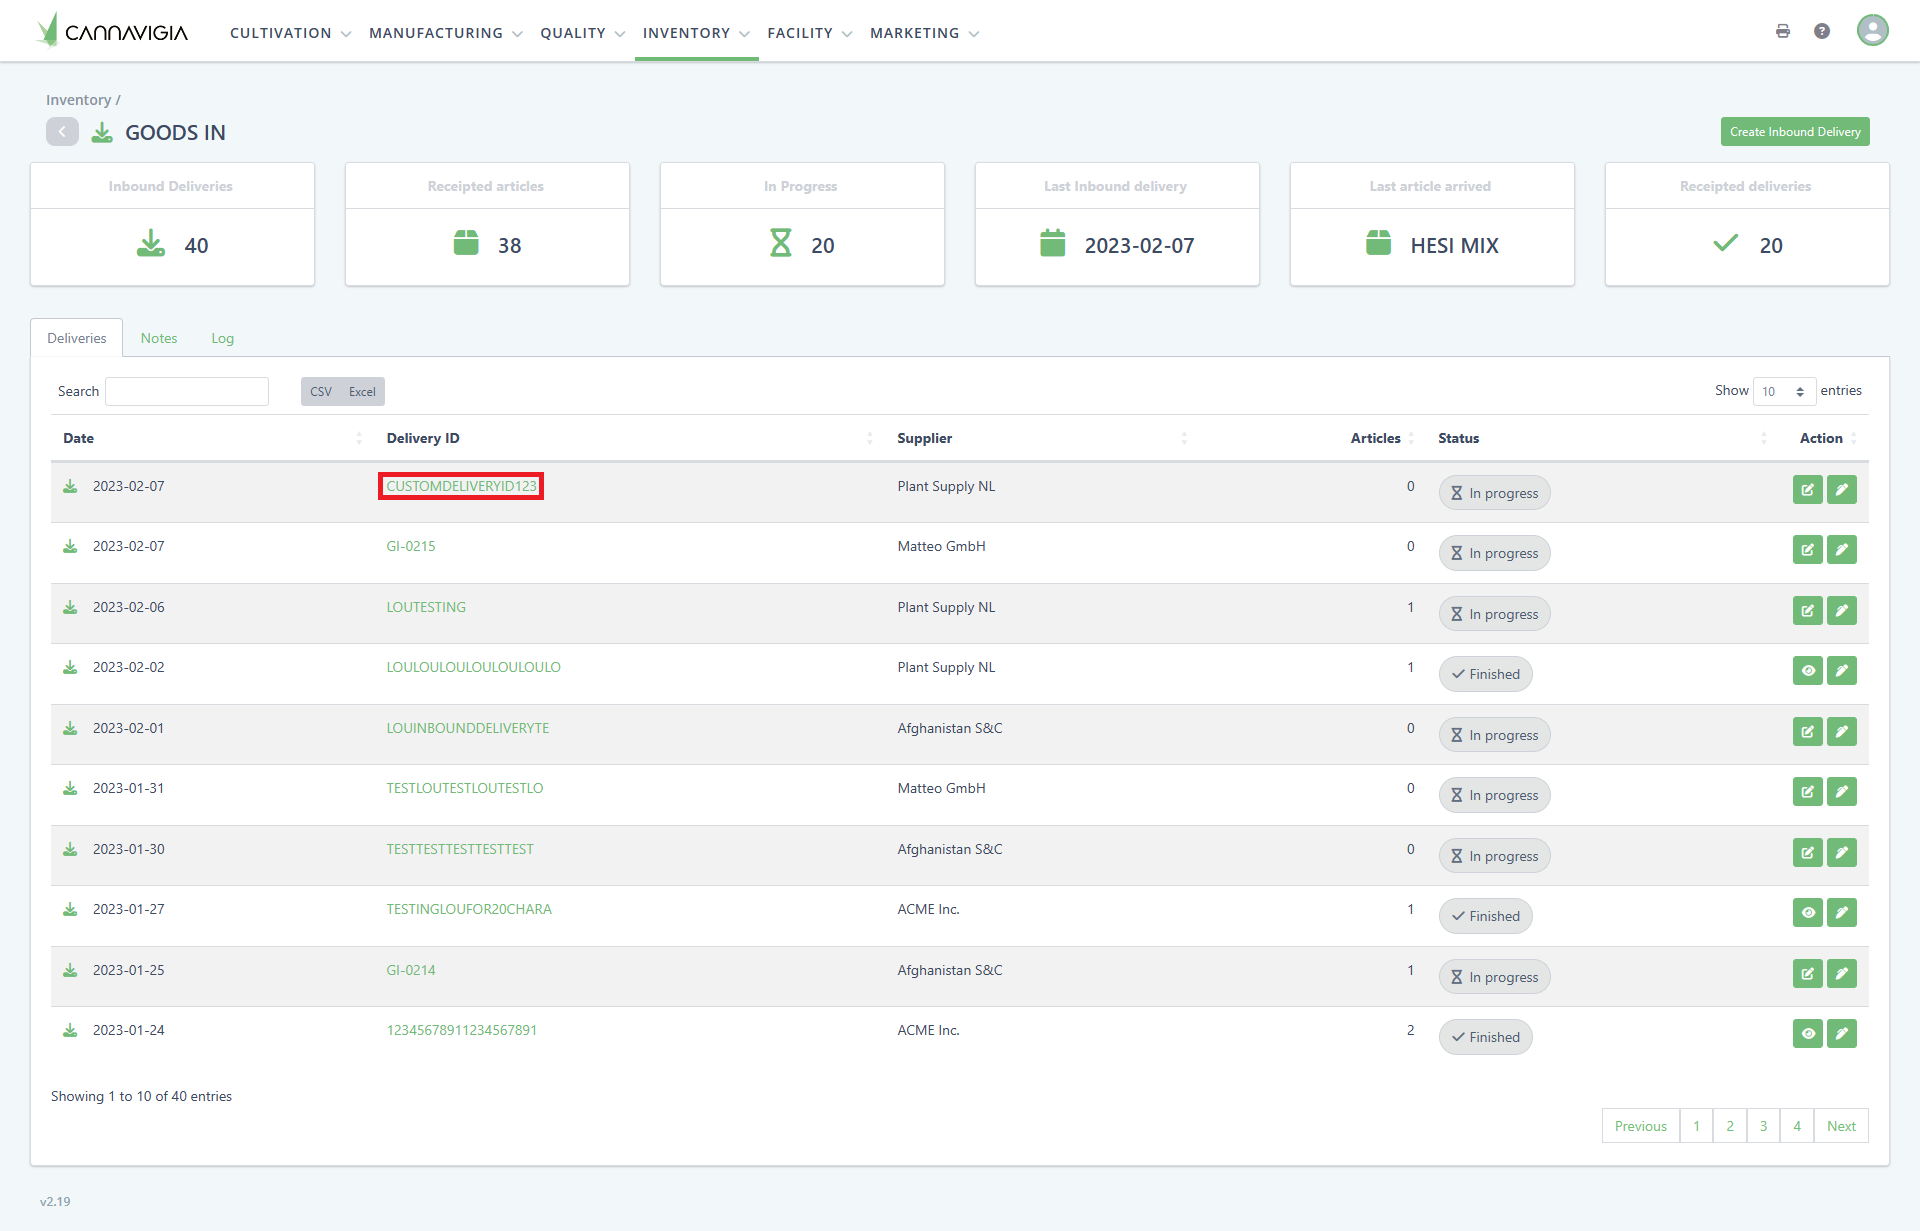
If you require to print QR Code Labels for Article Batches from Inbound Deliveries, you must navigate to Inventory > Goods In
-
Select your required Delivery Note ID by clicking on the green hyperlink of the Delivery Note ID to access the Inbound Delivery Detail View
-
When in the Inbound Delivery Detail View click Add QR code to print center button

- The QR code for your required Article Batch will be added to the Print Center
![]()
-
Access the Print Center, where your selected batch will be displayed automatically, choose the desired format and fields, and then click the green Print selection button to proceed to access your label

Edit an Inbound Delivery
-
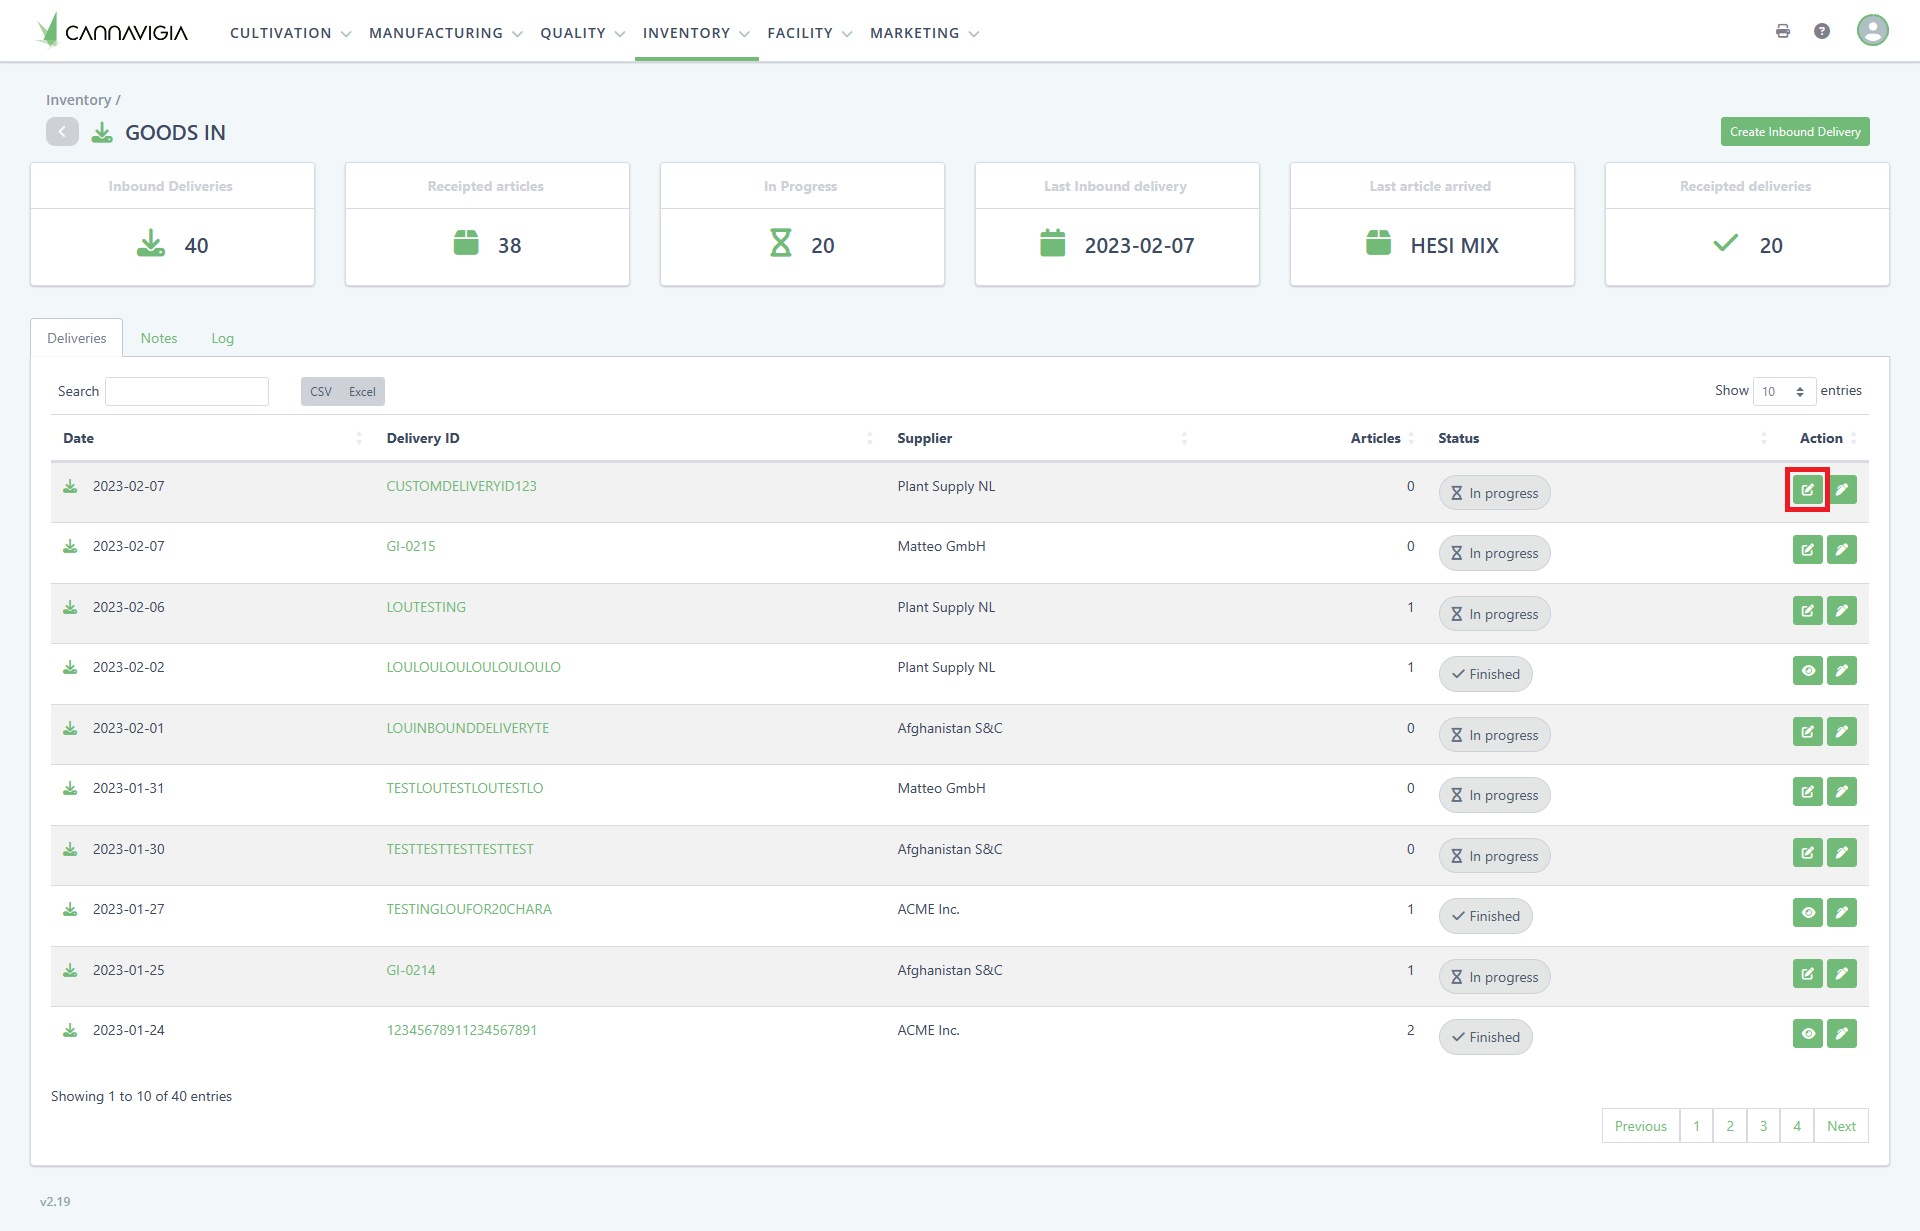
If you require to edit an Incoming Delivery, such as the Inbound Delivery Date or add/update a note you must navigate to the Edit button via Inventory > Goods In
-
Select which Inbound Delivery you would like to edit by clicking the Edit button under the Action column within the Goods In List View, on the row of your required Delivery ID
-
Edit the Supplier information you are required to and then click Save to save your changes / updates
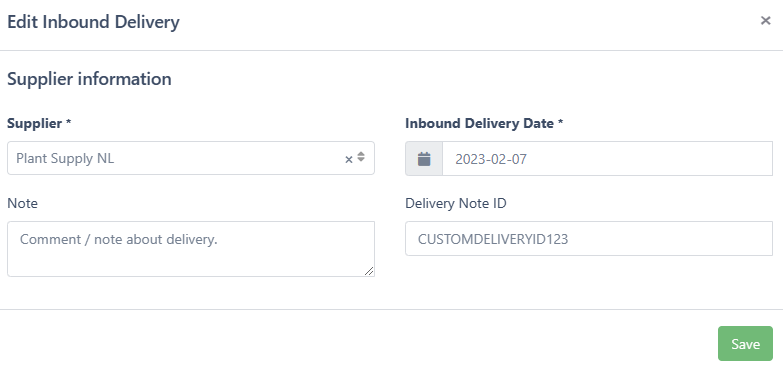
Note: If the status of the delivery is set to Finished you will no longer be able to edit the Inbound Delivery.
Edit an Article Batch
-
If you require to edit an Article Batch within an Inbound Delivery, you must navigate to Inventory > Goods In
-
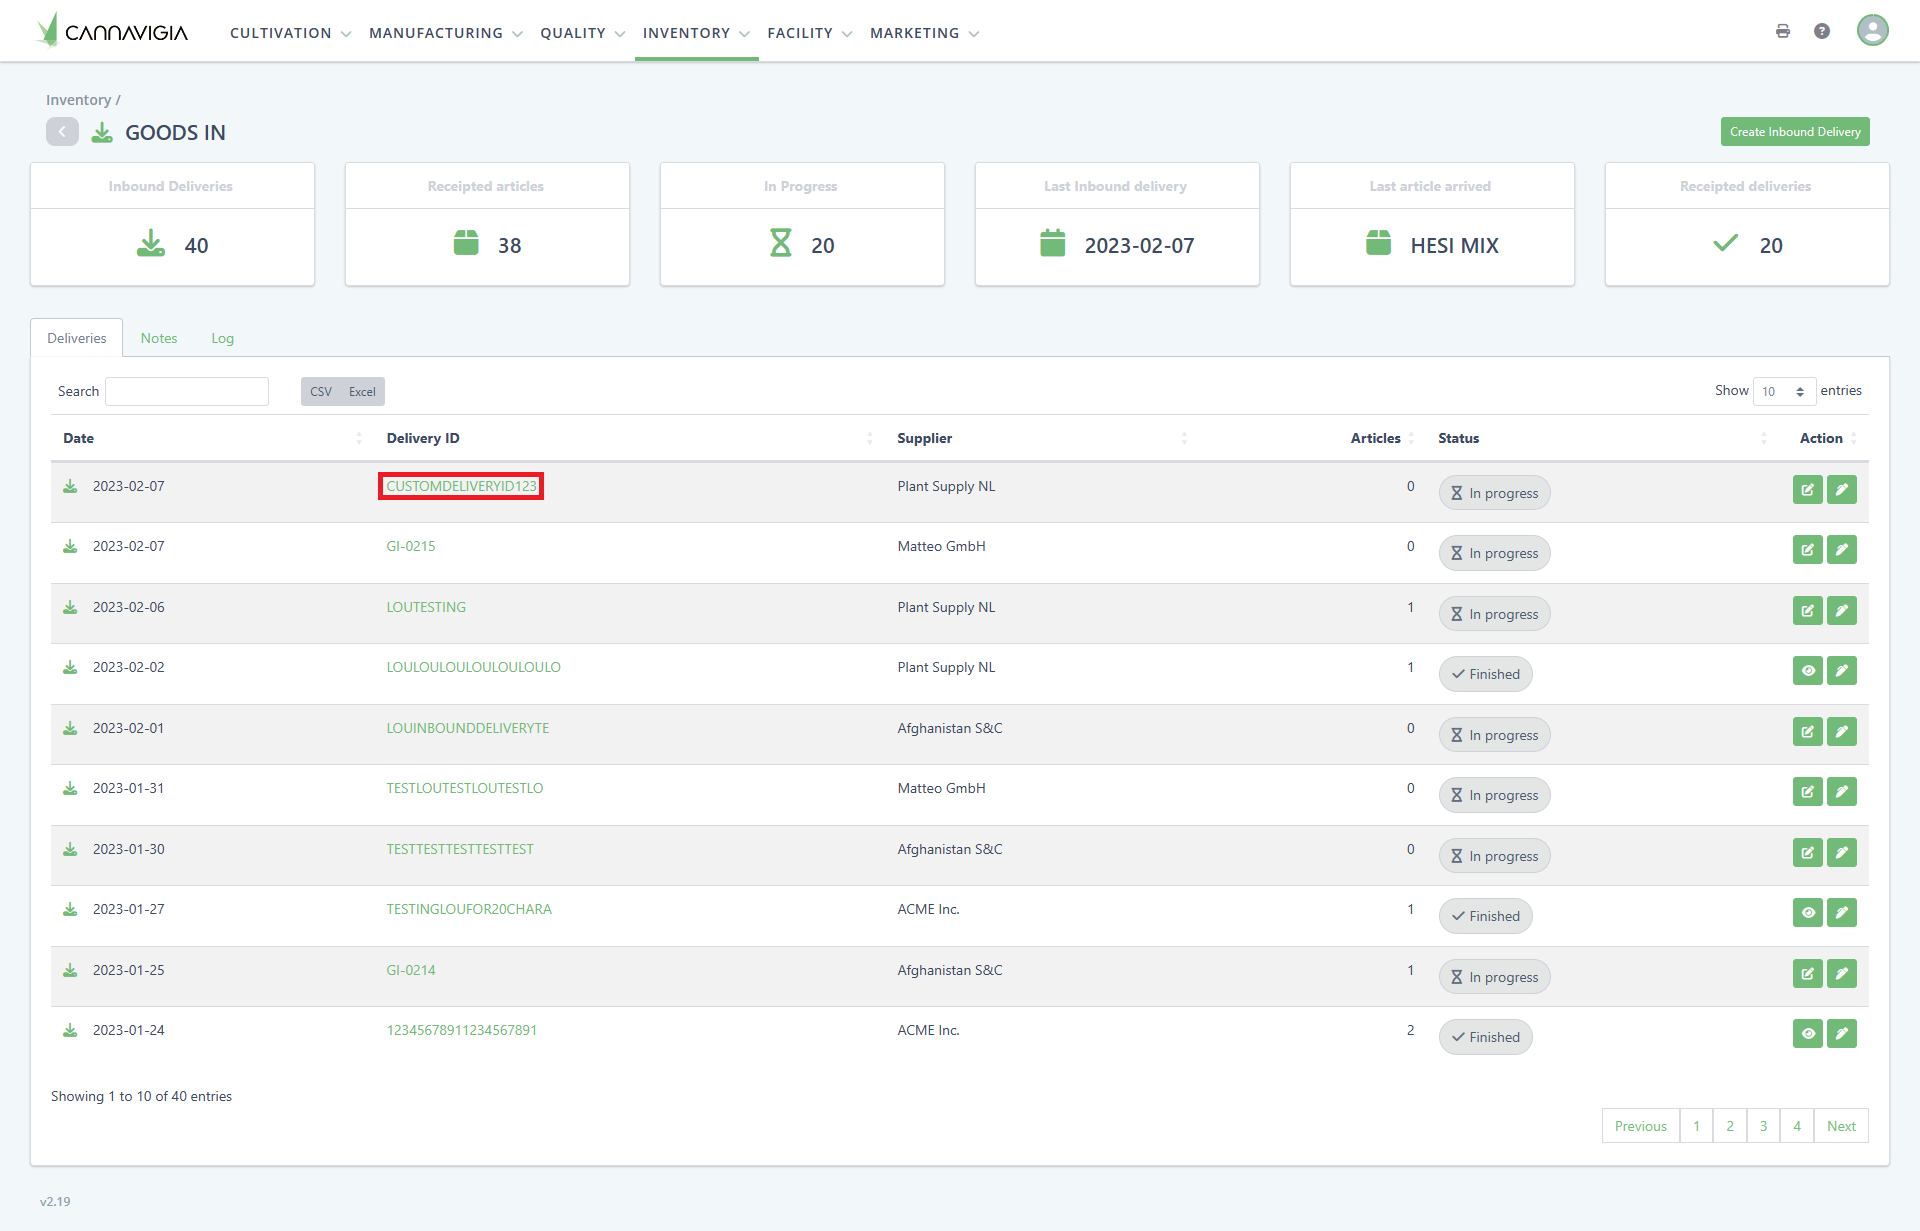
Select your required Delivery Note ID by clicking on the green hyperlink of the Delivery Note ID to access the Inbound Delivery Detail View
-
When in the Inbound Delivery Detail View click Edit Batch button to edit the required Article Batch

-
The Edit Batch modal appears where it will let you only edit the fields which are not greyed out
-
Once you have edited the required detail, please click Save to save your changes

Add Note to an Inbound Delivery
-
To add a note, navigate to the Inventory > Goods In
-
Select which Inbound Delivery you would like to add a note to by clicking the Add note button under the Action column within the Goods In List View, on the row of your required Delivery ID
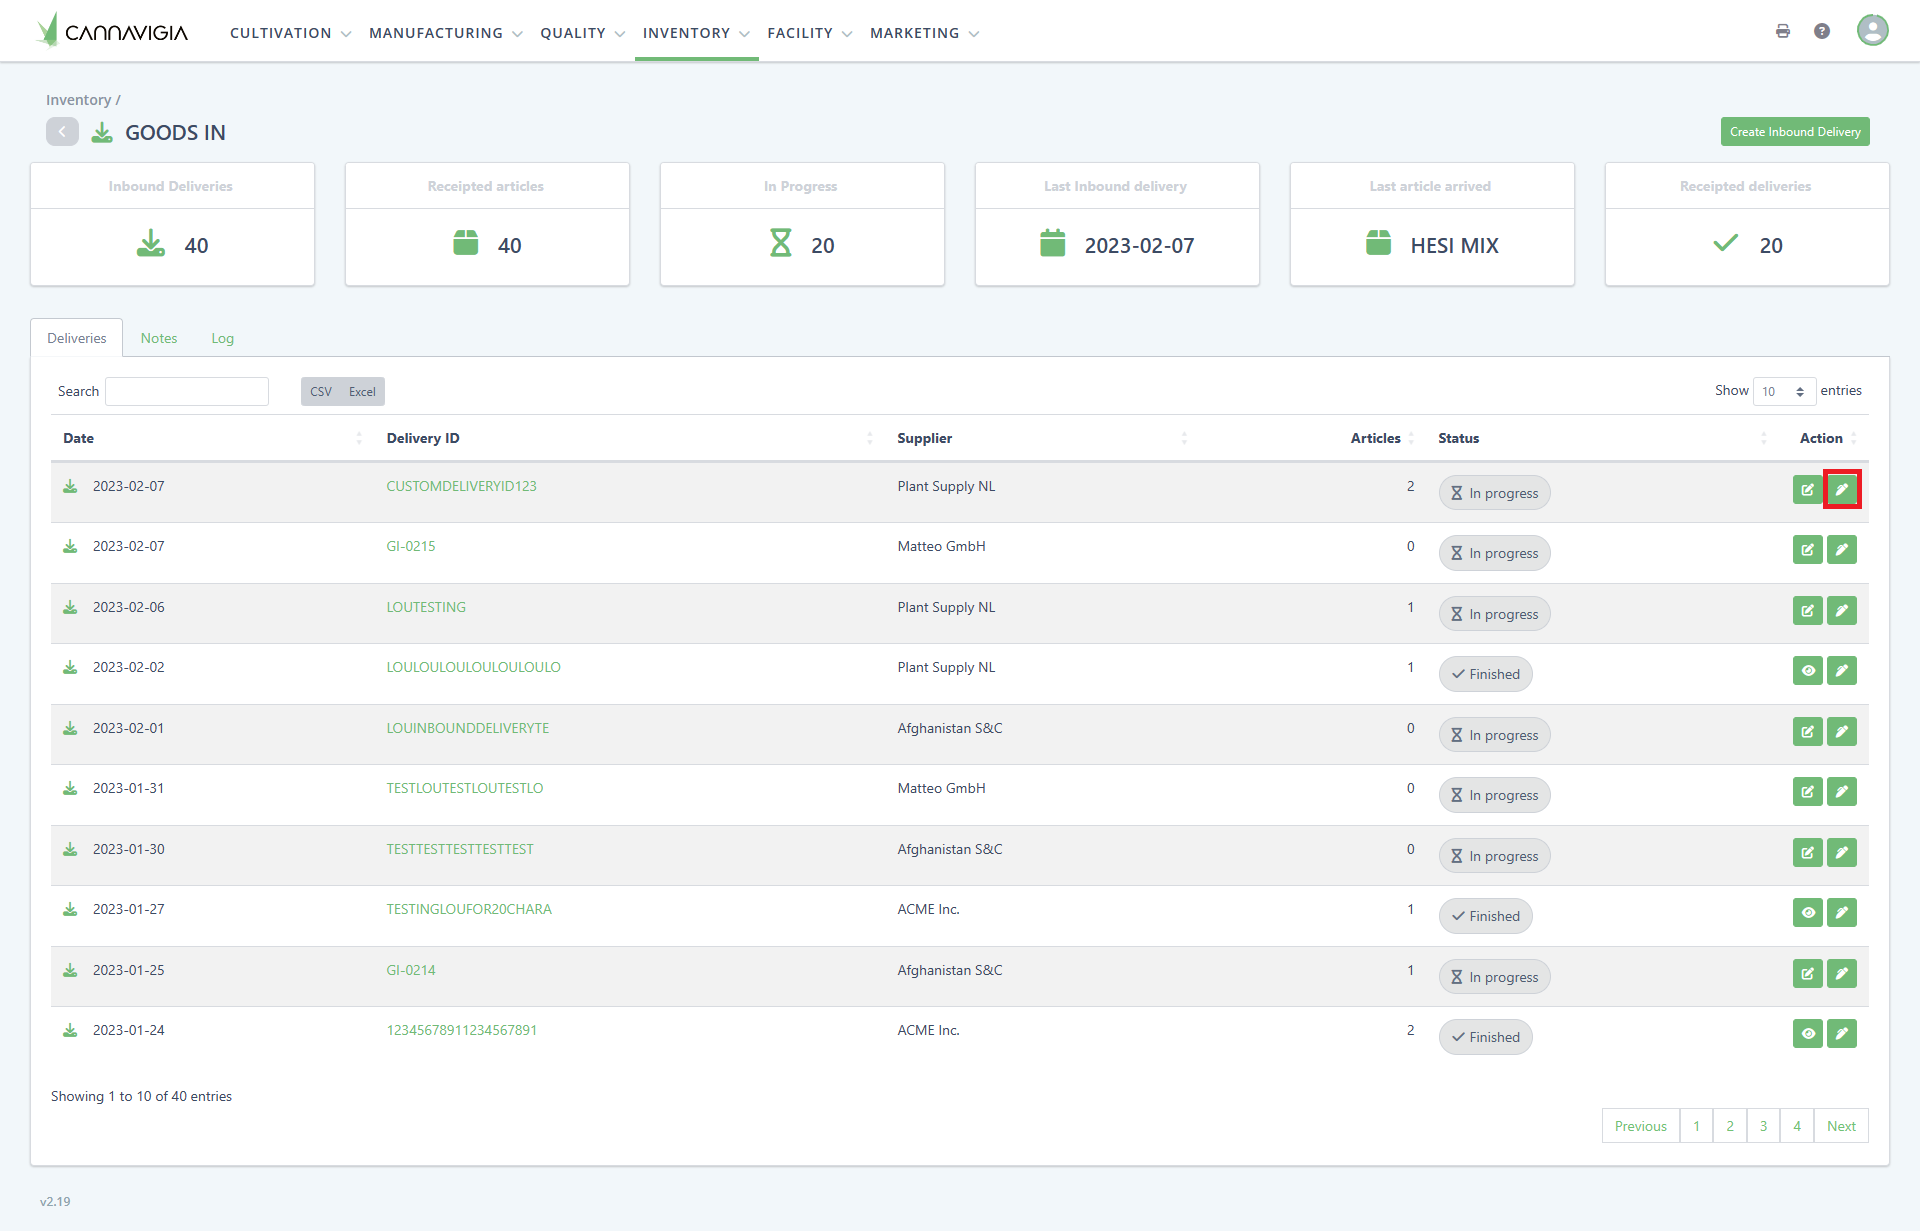
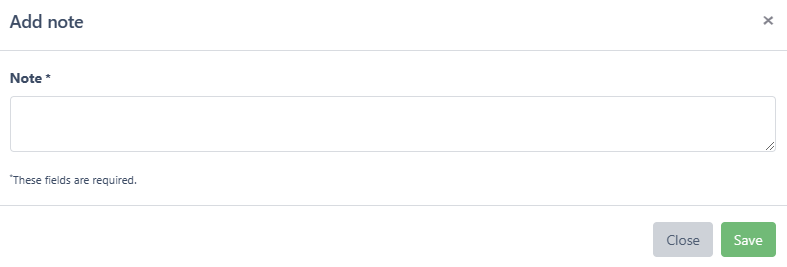
- The Add note modal appears where you can input your note and click Save to record your note
Overview Goods In and Troubleshooting
Overview Goods In
-
Once an Inbound Delivery has been created, it will appear in the Deliveries tab within Inventory > Goods In
-
You have the possibility to view details of a finished inbound delivery by clicking the View button
Troubleshooting
- Missing Articles: Ensure articles are pre-added in Inventory > Articles
- Incorrect Delivery ID: Double-check the ID format and ensure it matches the system's records